Creative Center
How to Use the Creative Center on Ecomdy Platform
1. Introduction
The Creative Center is an automated video creation tool on the Ecomdy Platform. Simply enter your product information and upload media — the system will automatically generate a script, edit the video, and create multiple versions suitable for ads or social media posts. This helps advertisers save time and increase conversions.
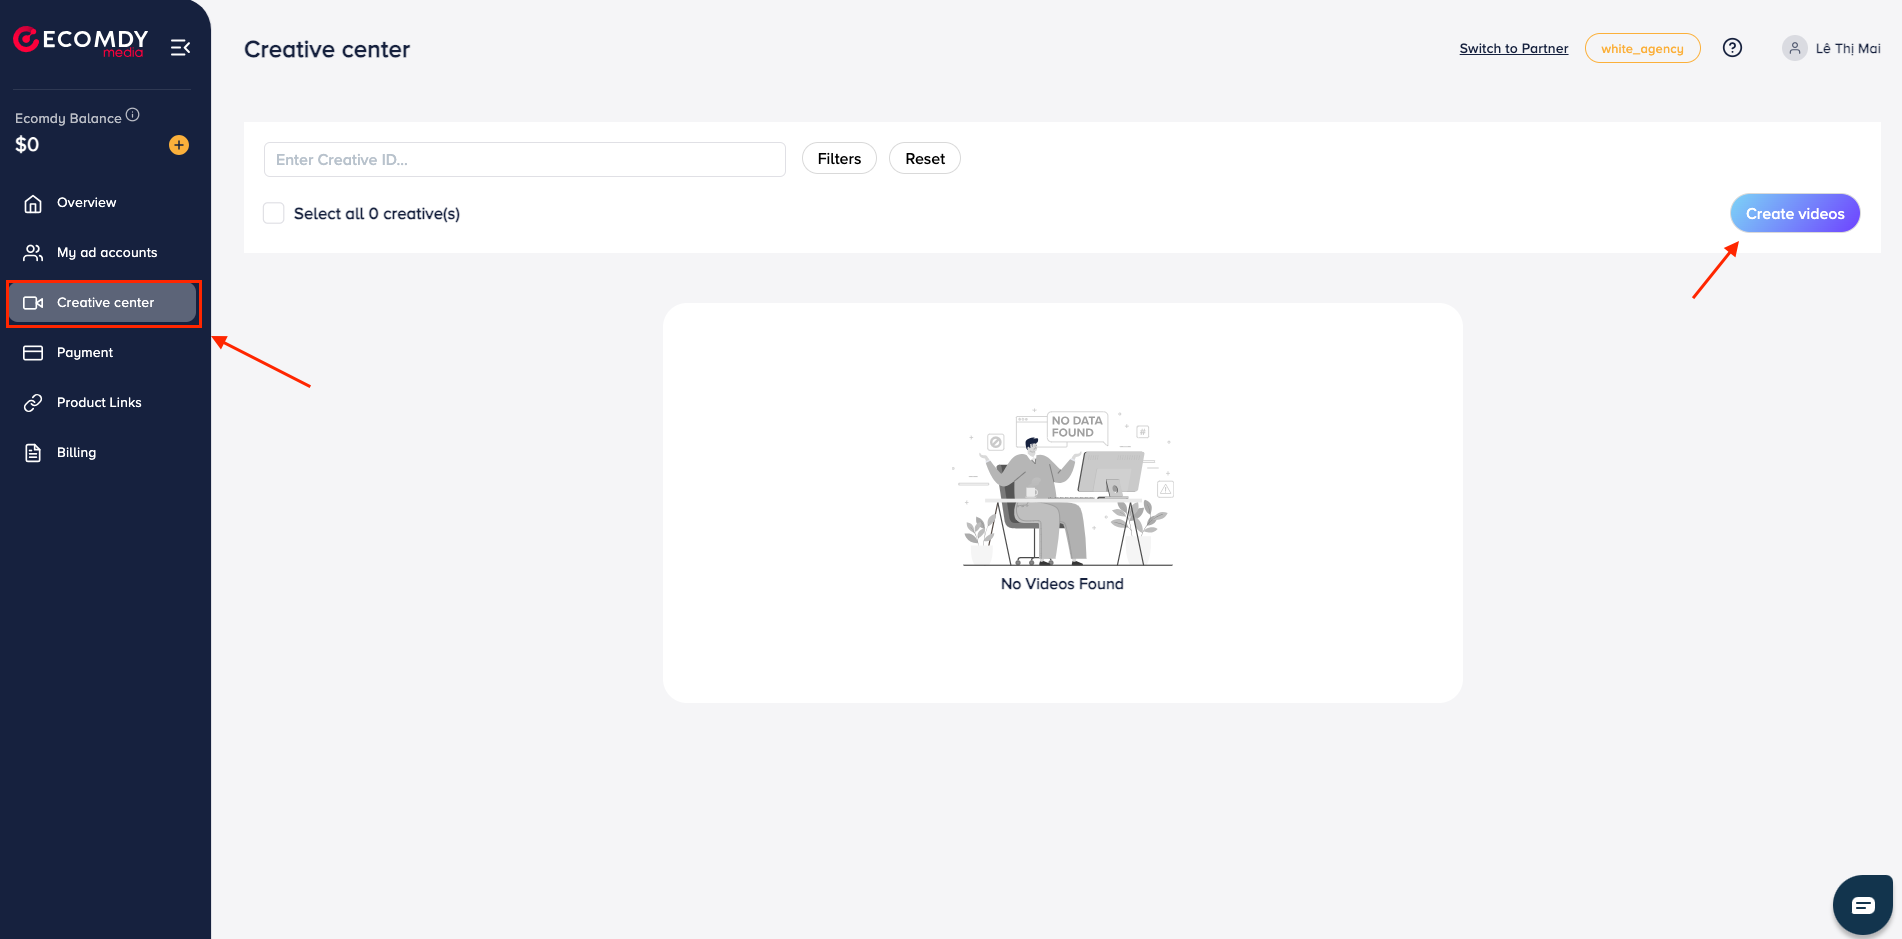
- Go to: https://tiktok.ecomdymedia.com/ => Click on the “Creative Center” tab => Click the “Create Video” button
2. AI Video Generation
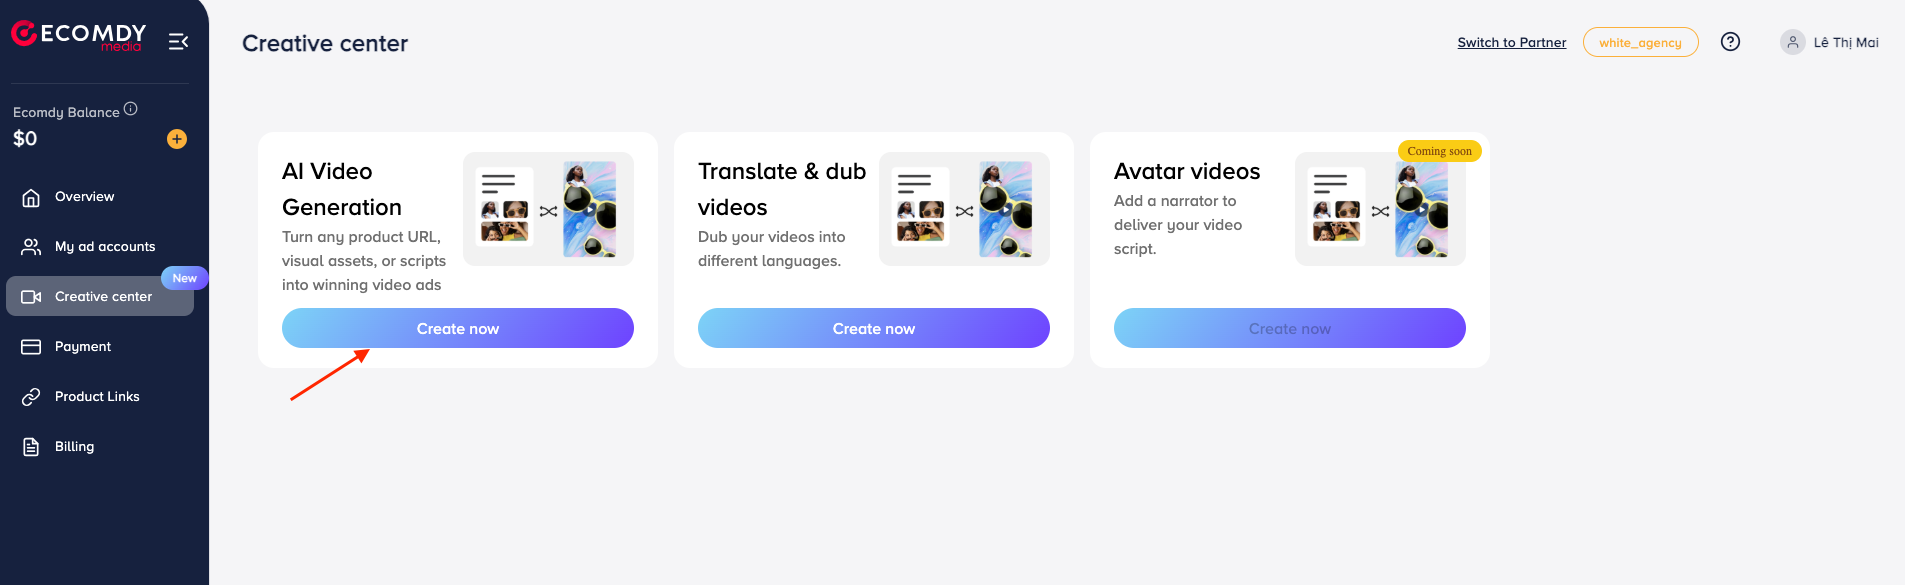
Click “Create Now” under the AI Video Generation section.
STEP 1: Fill Informations
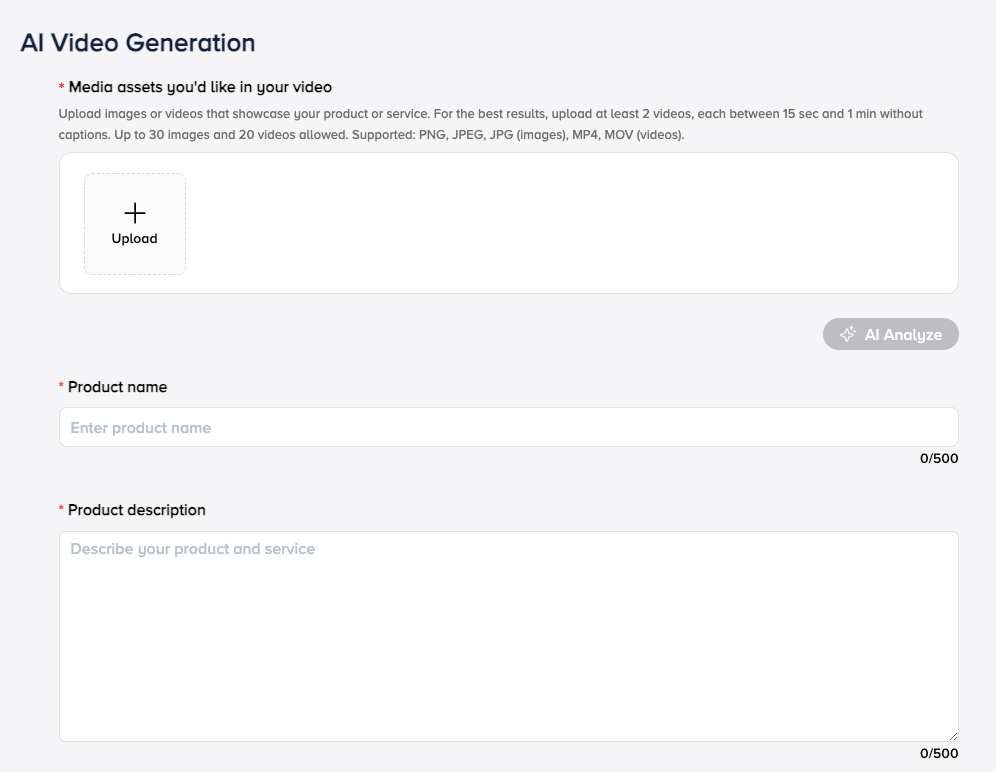
1. Upload Media (Required)
- Click the "Upload" button or drag and drop your files into the upload area. Supported formats: Images (PNG, JPG, JPEG), Videos (MP4, MOV)
- Upload at least 2 videos (15s – 1 min)
- Use 5–10 clear images (no watermark)
- Avoid videos with captions or text overlays
- Use sharp images only — no blur or text.
- Shoot videos with clean, bright backgrounds. No watermark or captions.
Click the AI Analyze button to let the AI auto-generate key product info like: Product name, Description, Selling points. Or you can fill in the details manually.
2. Product Name (Required):
Enter the name of your product (up to 500 characters). Keep it short, clear, and relevant to the product category.
3. Product Description (Required):
Write a short product description (up to 500 characters). Highlight the main function and key benefits of your product.
4. Brand & Price (Optional)

You can enter your brand name and product price. This step is optional, but if provided, these details will be included in the final video.
5. Selling Points (Optional)
Add up to 10 key selling points to highlight your product’s unique features, promotions, or pricing offers.
- Each selling point should be no more than 10 words.
- Examples: "Buy 1 get 1 free"; "Best deal of the month"; "Free nationwide shipping"; "100% cotton fabric"...
6. Language:
The default language is English. You can change to another supported language from the dropdown list.
7. Avatar (Optional)
Select an AI avatar that matches your product style. If no avatar is selected, the system will randomly assign one. This feature is only available if you upload at least 3 images.
STEP 2: Generate Video
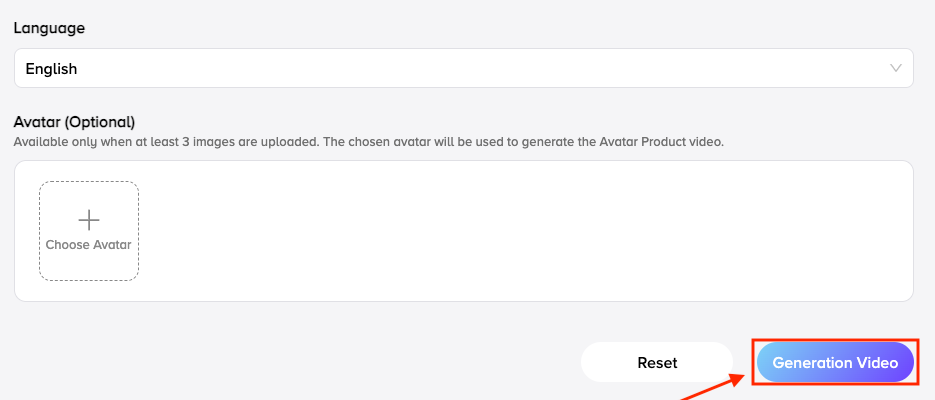
- Click the "Generate Video" button → The system will automatically create a video based on the content and media you’ve provided.
- If you want to start over, click "Reset" → All entered data will be cleared and the form will reset.

- Processing speed depends on the number of images and videos uploaded. The system will generate 5 to 15 videos, depending on the information and media you provided.
Each generated video will be labeled with a tag indicating its content type:
- Voiceover: A video edited from your uploaded media, featuring a script and voiceover to introduce your product or service.
- Avatar Product: A video combining your product information and media with an AI avatar presenting or promoting the product.
- Stock Video: A video edited using your content along with relevant or viral stock footage to highlight your product or service.
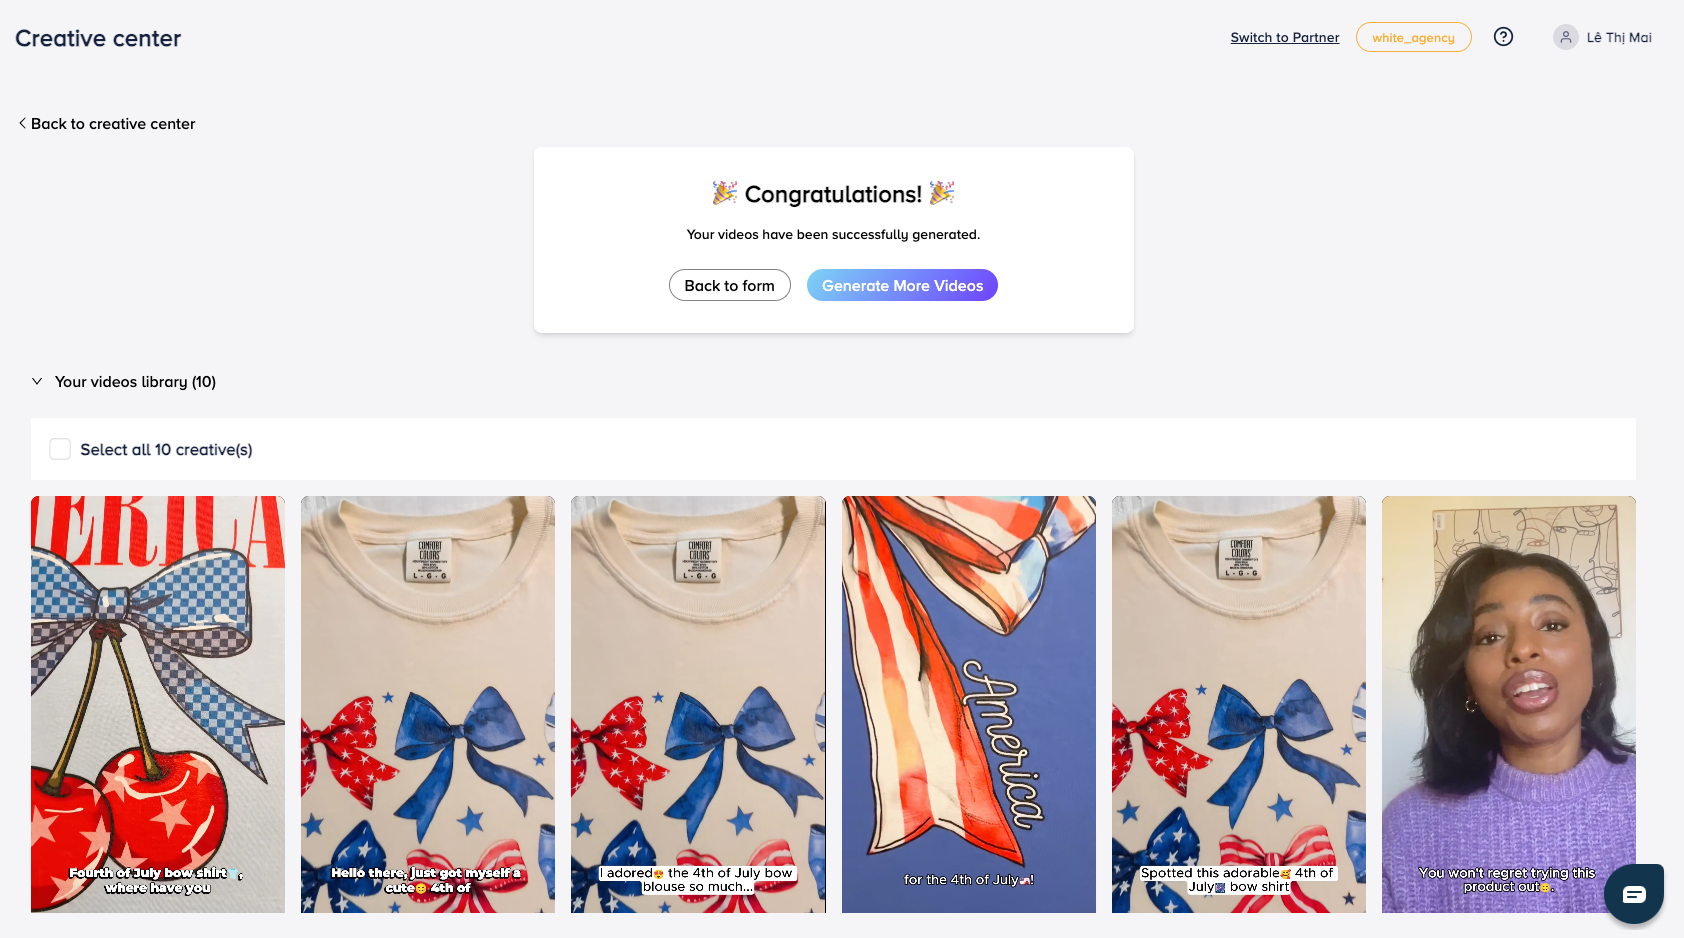
Once processing is complete, you can click "Generate More Videos" to create additional versions using the saved data, or click "Back to Form" to return and edit your inputs.
STEP 3: Using Your Video
After your video is generated, you can take the following actions:
- Sync to TTAM: Send the video directly to the TikTok Ads Manager (TTAM) for ad campaigns.
- Save to library: Store the video in your Ecomdy creative center for future use.
- Download: Download the video file to your device.
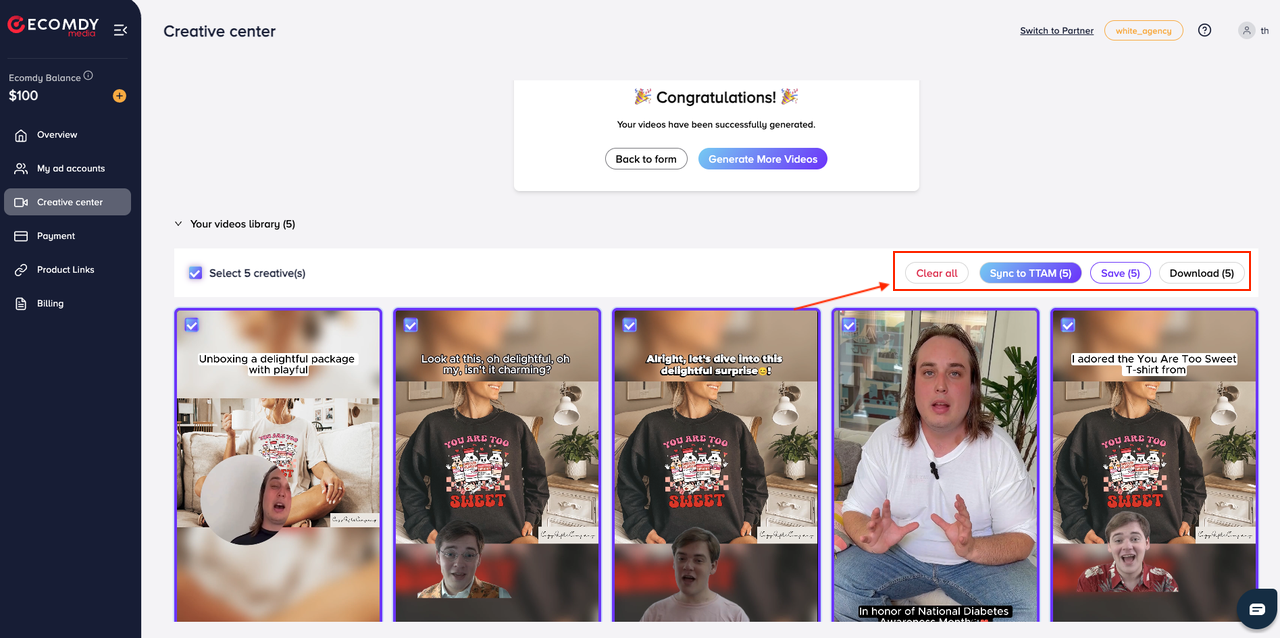
1. Sync to TTAM:
- Select the videos you want to sync.
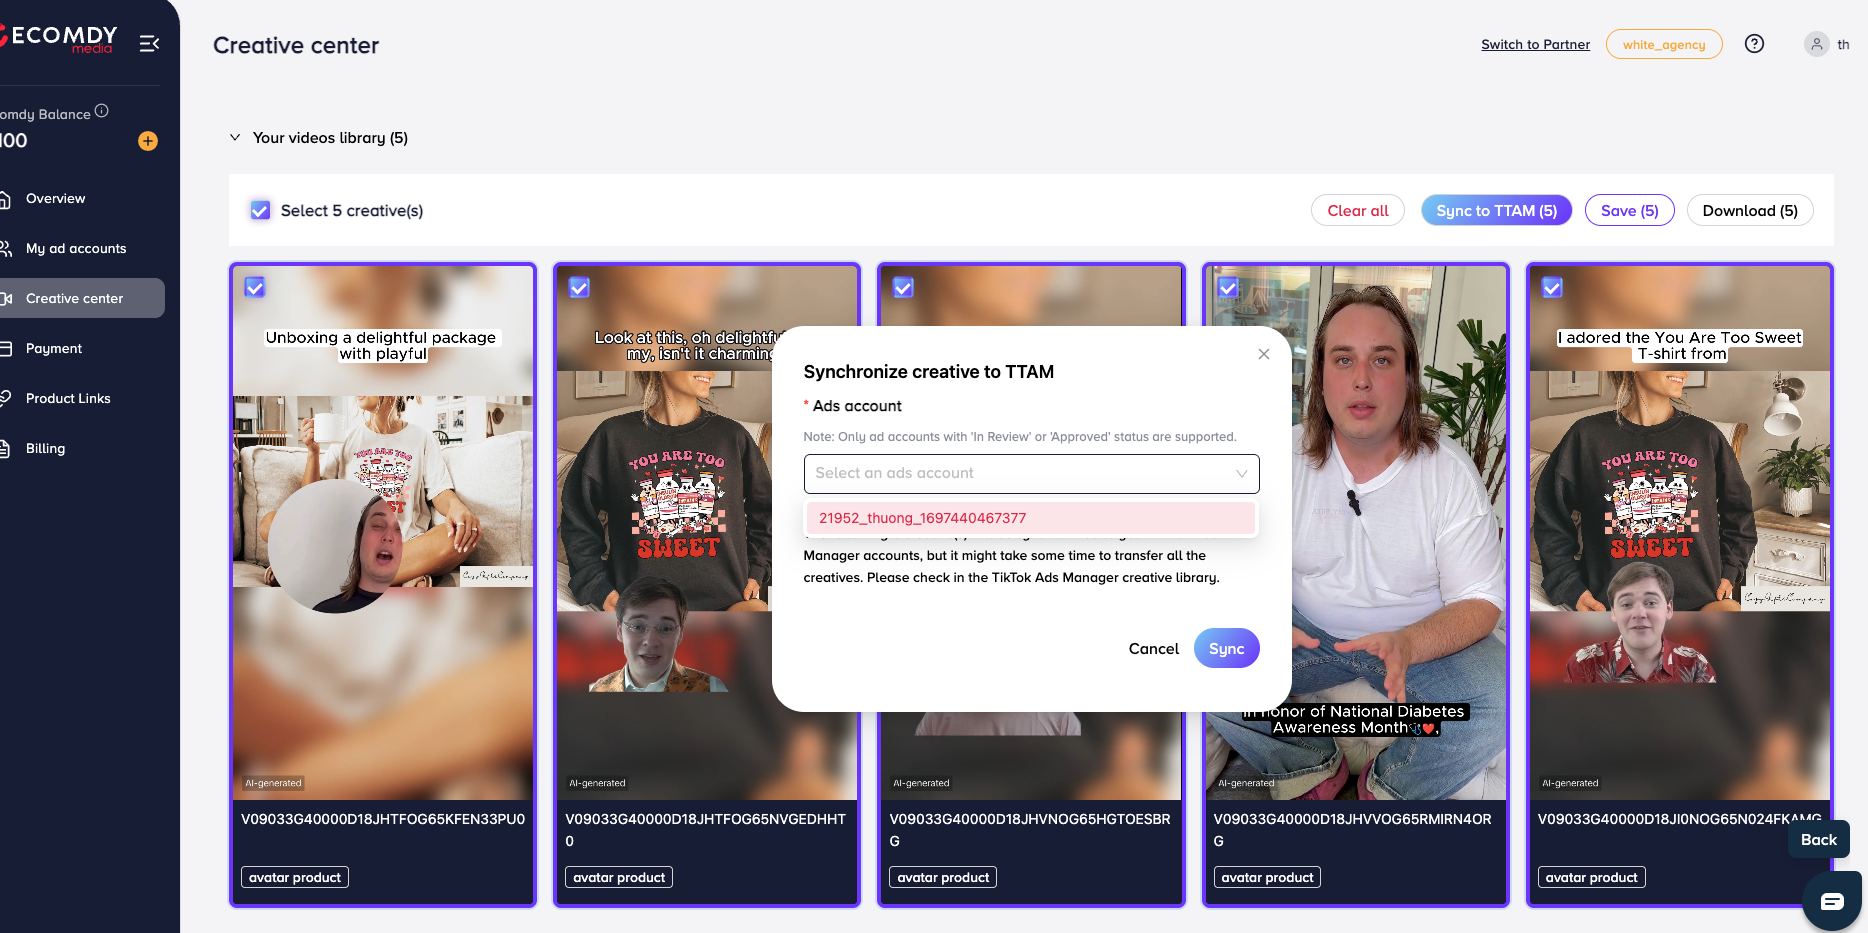
- Click the "Sync to TTAM" button. The videos will also be saved automatically to your Ecomdy creative center.
- Choose the Ad Account you want to sync the videos to.
- Click "Sync" to confirm.
(Note: Once synced successfully, the videos will appear in your TikTok Ads account. To check, go to: TikTok Ads Manager → Ads Account → Tools → Creative Library)
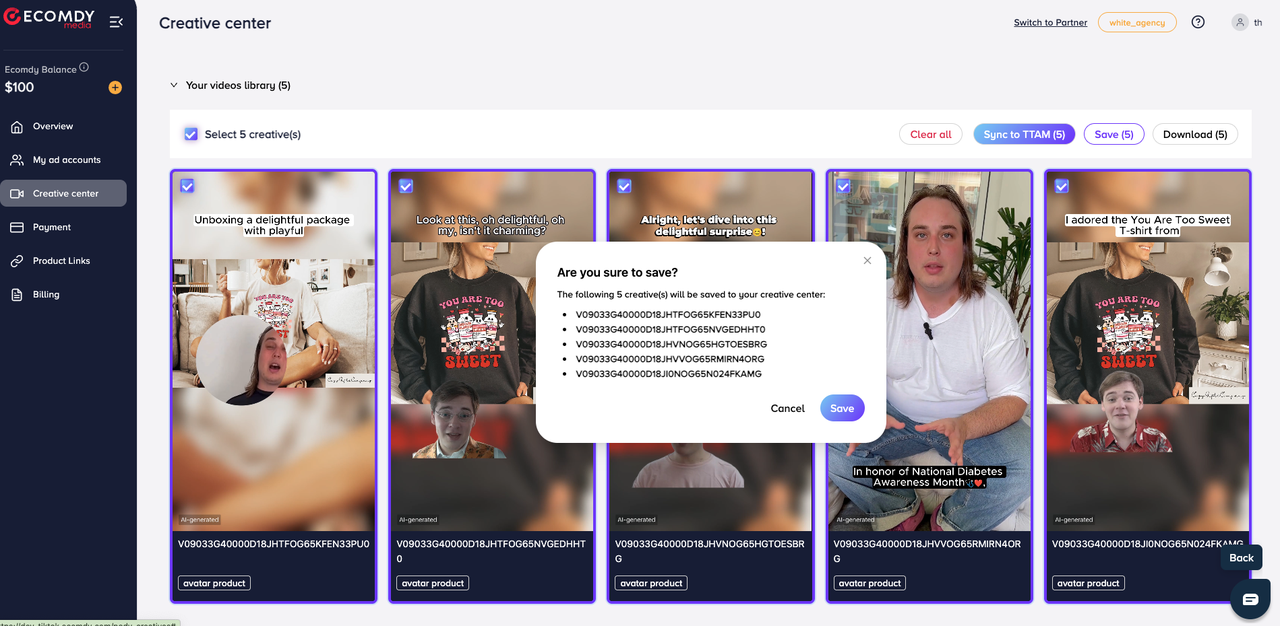
2. Save to Creative Center
- Select the videos you want to save.
- Click the "Save" button.
- A confirmation popup will appear → Click "Confirm" to proceed. The videos will be successfully saved to your Creative Center library.
3. Download to Your Device
- Select the videos you want to download.
- Click the "Download" button. The videos will be successfully downloaded → Check your downloads folder to access the files.
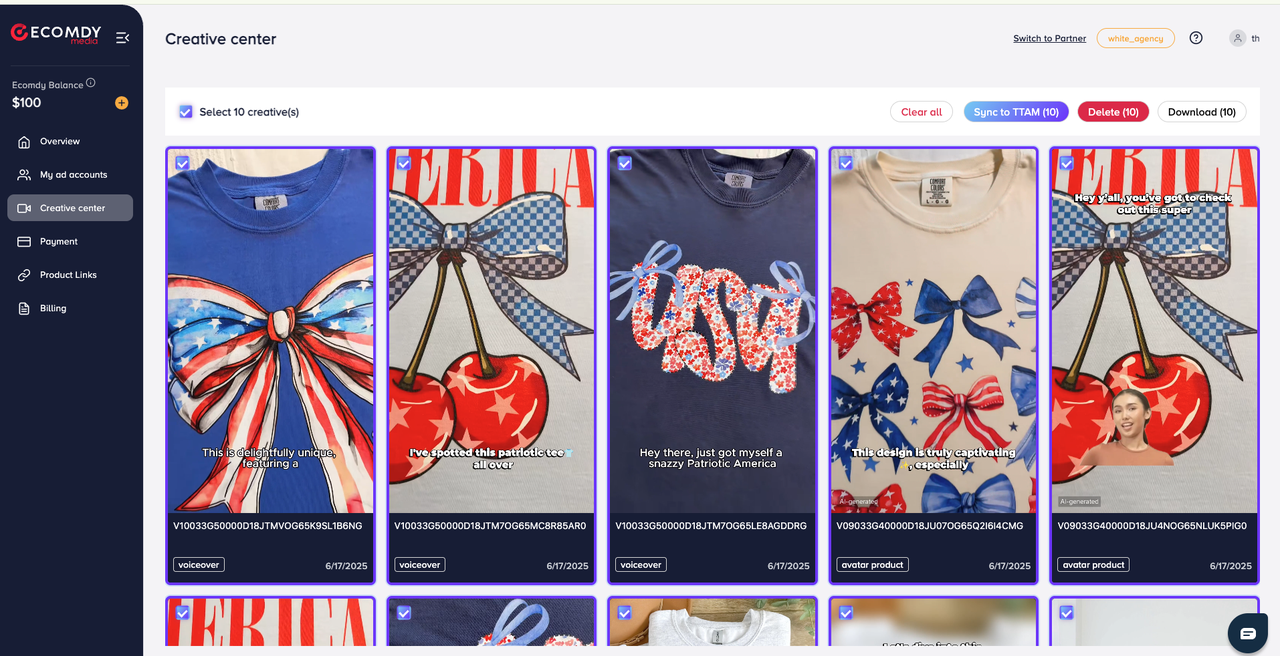
STEP 4: Manage Videos in the Creative Center
The Creative Center stores all videos you've saved or synced to TTAM during the video creation process. Within the Creative Center, you can:
- Delete videos – Remove any videos you no longer need.
- Sync to TTAM – Send saved videos to your TikTok Ads Manager account.
- Download videos – Download videos directly to your device for use.
- Delete Videos: Select the videos you want to delete => Click the "Delete" button.
- Sync Videos to TikTok Ads Manager (TTAM)
- Select the videos you want to sync => Click the "Sync to TTAM" button => Choose the Ad Account where you want to sync the videos => Click "Sync" to confirm.
- Download Videos: Select the videos you want to download => Click the "Download" button.
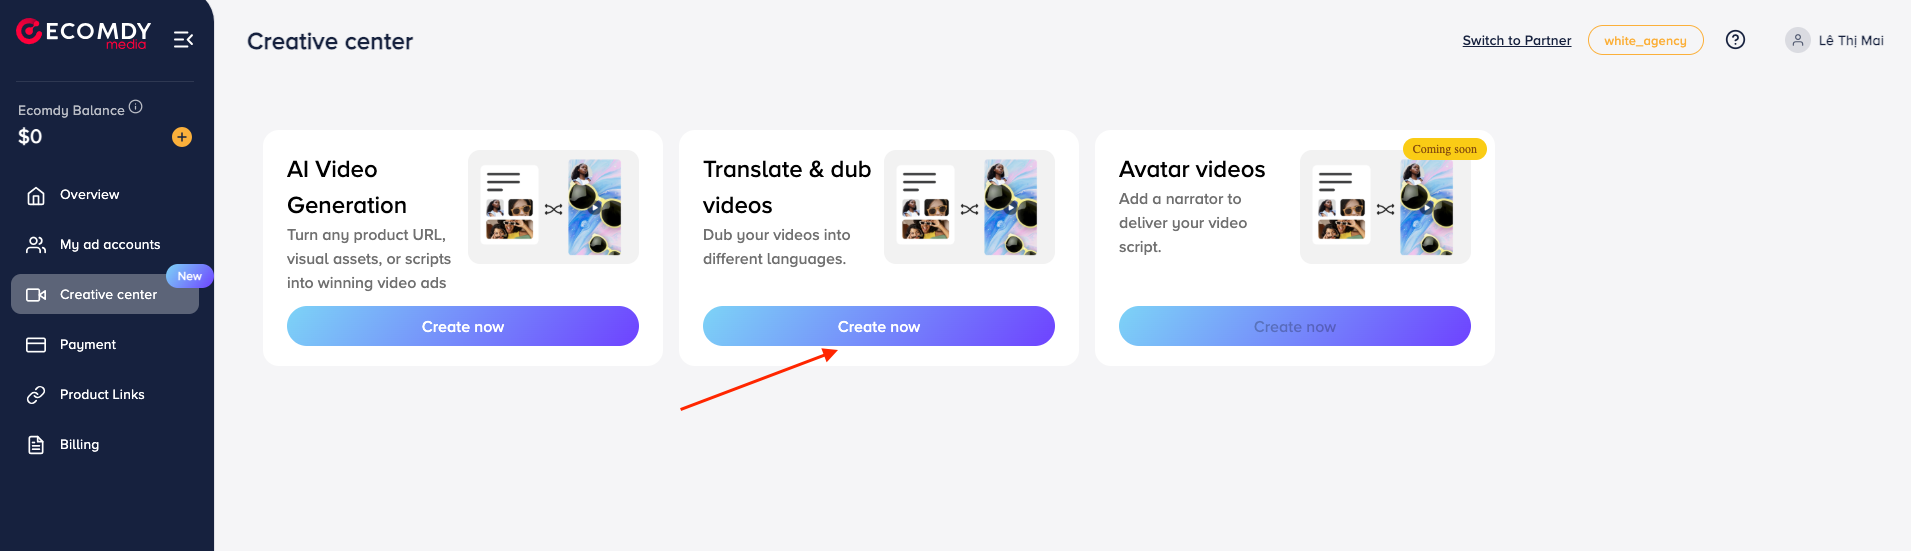
3. Translate and dub videos
Click “Create Now” under the Translate & dub videos section.
STEP 1: Fill in Information
3. Upload video
You can upload up to 5 videos for translation using one of the following methods:
- Drag and drop your videos into the Upload video box
- Click on Upload video and select files from your computer
- Click on Upload video and choose videos from your Creative Center Library

✅ Best Practices
- Format: .mp4 or .mov; video duration no longer than 5 minutes; file size under 200MB
- Use high-resolution video
- Film in a well-lit environment
- Ensure only one person is speaking, facing the camera directly
- Recommended video length: 10 seconds to 5 minutes
⚠️ Avoid the Following
- Mouth is covered or obstructed
- Continuous speaking without natural pauses
- Loud background noise
- Shadows on the face or surrounding areas
3. Choose Language
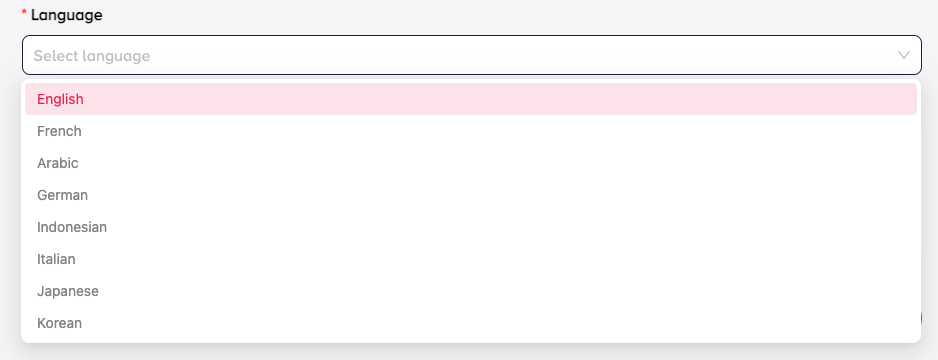
Choose a language to translate your video into. You can easily translate and dub your ad videos into 13 different languages, including: English, French, Arabic, German, Indonesian, Italian, Japanese, Korean, Portuguese, Spanish, Turkish, Thai, Vietnamese.
3. Enable Lip-sync and Subtitles

- Lip-sync: This feature synchronizes mouth movements with the dubbed voice when enabled. Enabling Lip-sync will increase video generation time by approximately 5–10 minutes. This feature works best for videos with clear speaking individuals.
Lip-sync may not work properly if:
- Multiple people are speaking at the same time
- The speaker’s mouth is covered
- Lighting conditions are poor
- There’s irrelevant background noise
- Subtitle: Auto-generated subtitles will appear at the bottom of the video with a white background and black text.
Click the "Generate Video" button to begin translating and dubbing your video.
(See Section 2 for steps on using and managing your generated video.)